Overview of the operator screen
Production Record
Manual production reporting is done from this screen. Operators can also view automated production reporting and adjust the events if they have permission.
Depending on what permission you have available, you can select how to visualize your Operator Screen: Standard Operator Screen, Throughput Operator Screen, and Legacy Operator Screen.

Standard Operator Screen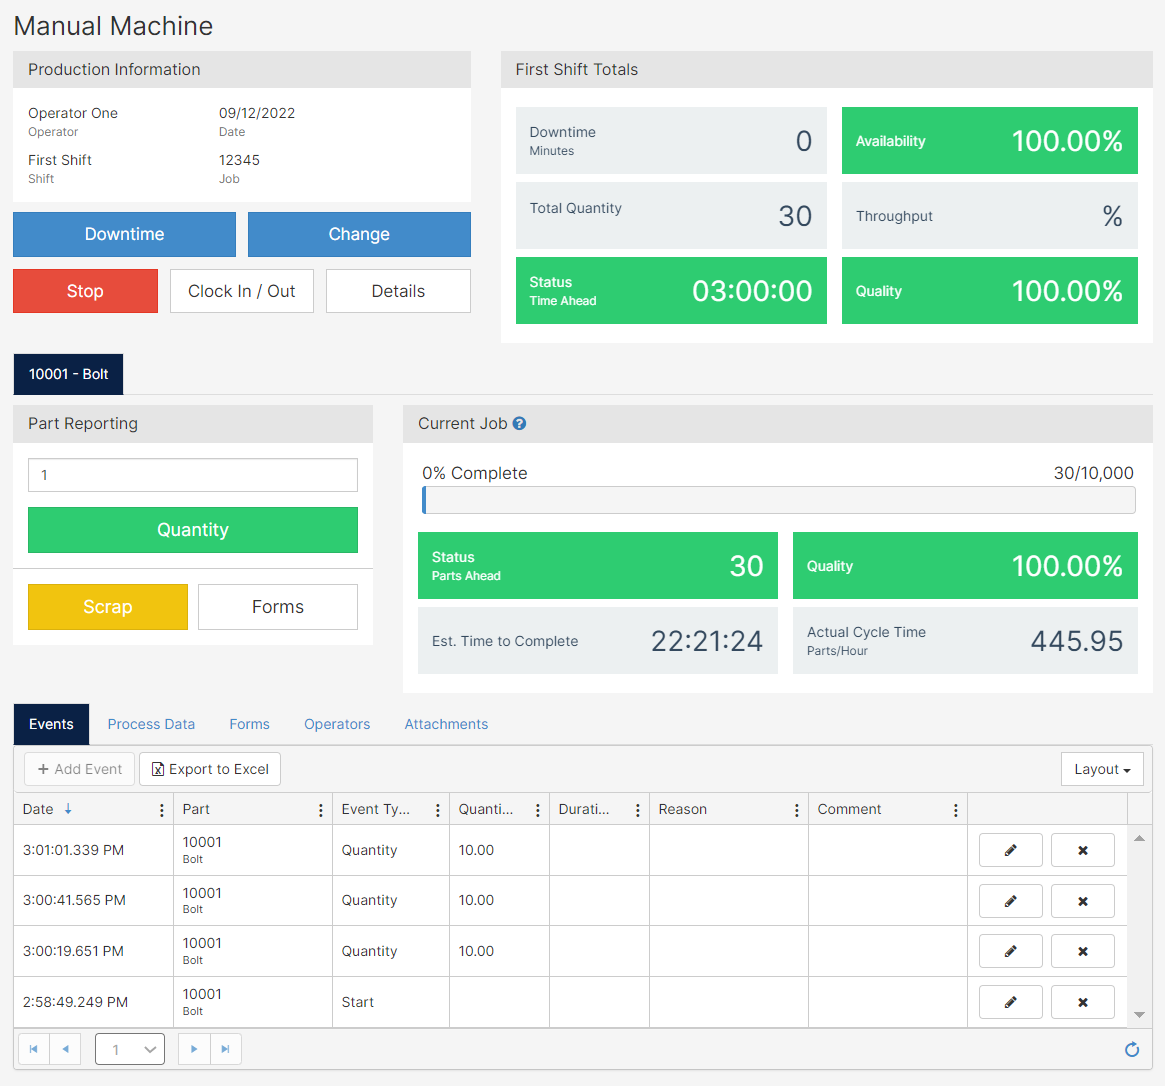
Throughput Operator Screen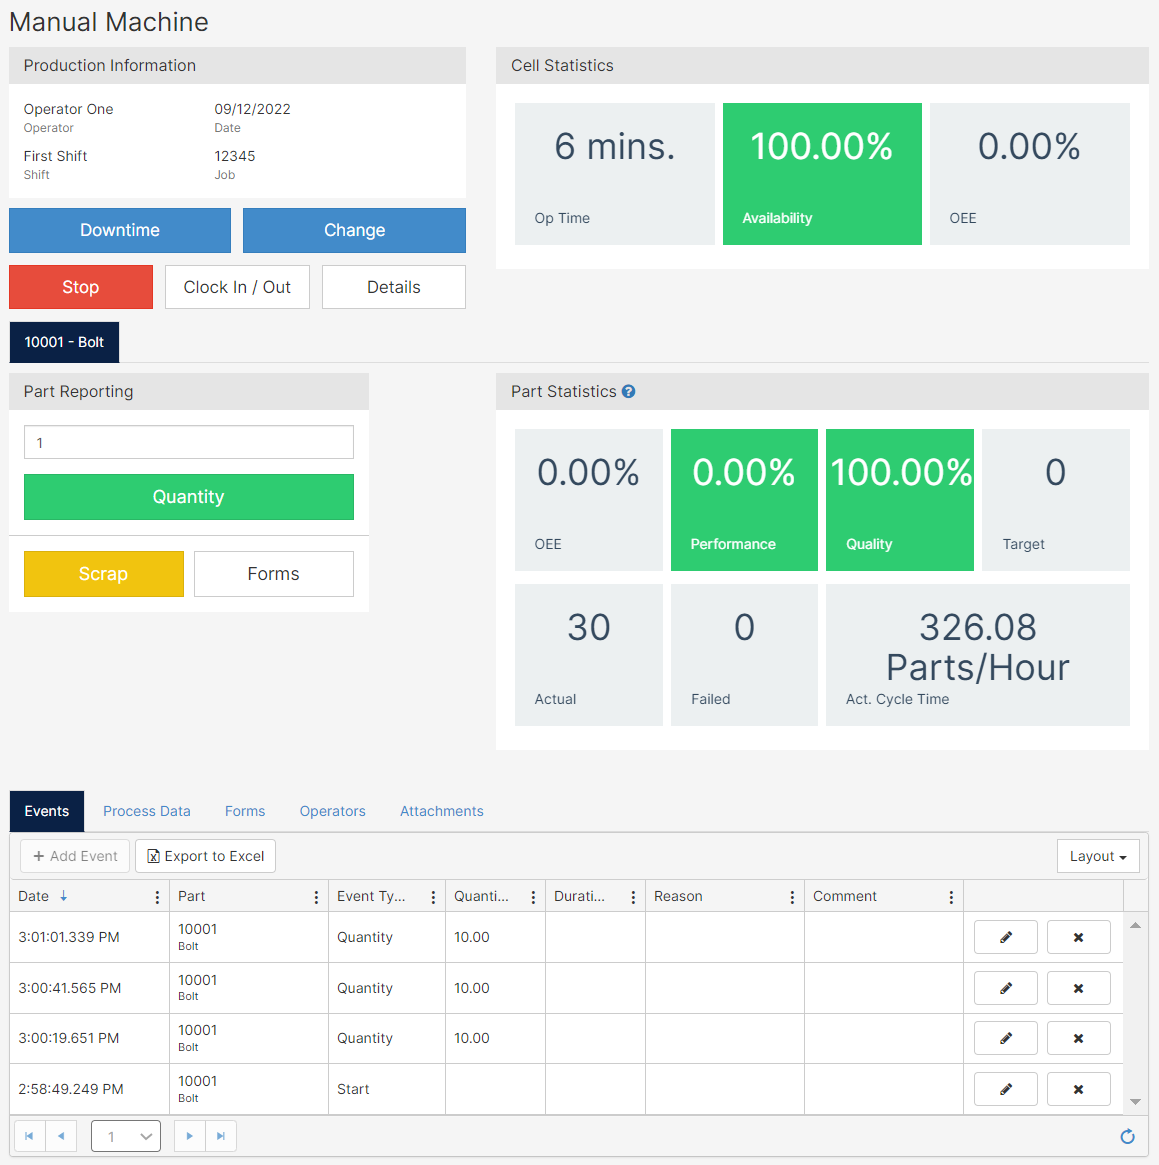
Legacy Operator Screen
Production Information
The operator will be able to view the Operator Name, Date, Shift Name, and Job Number.
Downtime
You can manually record downtime by clicking on the  button. A popup screen with all the downtime codes assigned to that machine will be visible. After choosing a downtime reason code, an operator can start a timer or set a manual duration in minutes. If more information is needed, the operator can use the comment line to leave a remark.
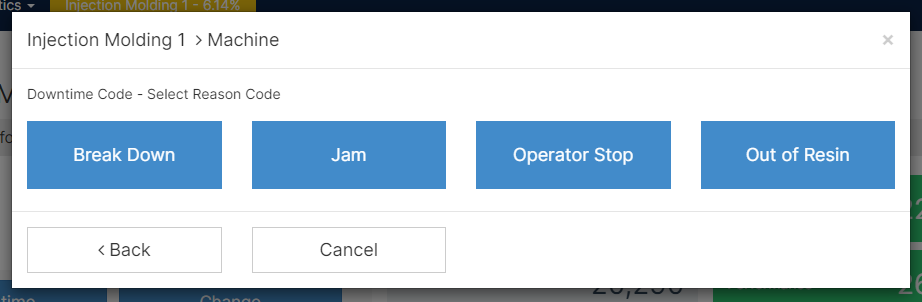
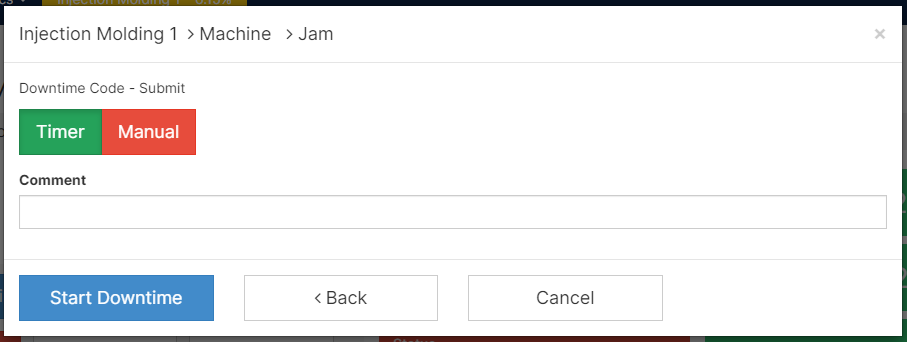
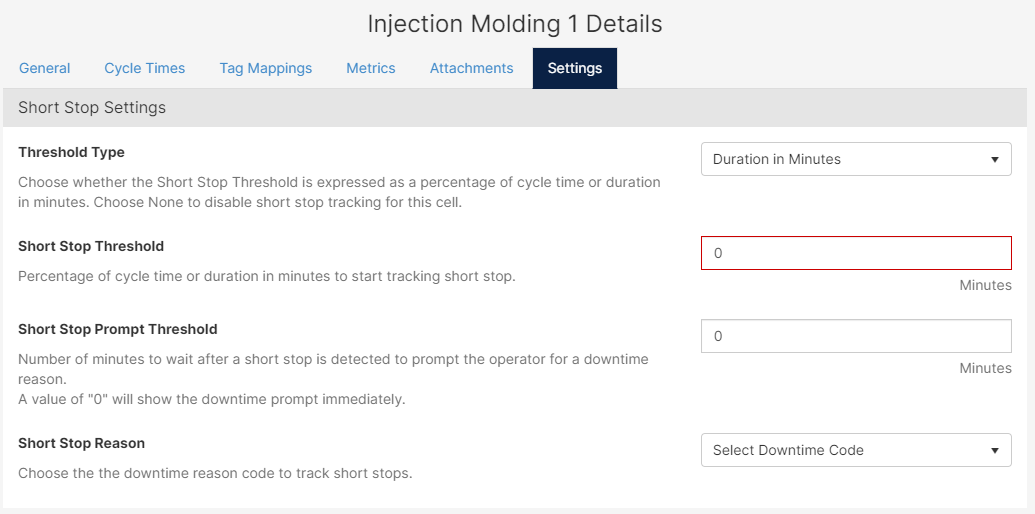
if a Cell/Machine is configured for Short Stop, it can auto-launch the prompt when the machine goes down after a certain number of minutes has passed with no activity. This option can be found in the setting tab of the machine.
Change Overs
An operator or supervisor can initiate a changeover directly from the Operator Screen, just click the  button on the screen. A production change-over screen will give you a summary of the production run, require you to mark the job as completed or not, and change to another work order (scheduled or unscheduled) and to a no working state.
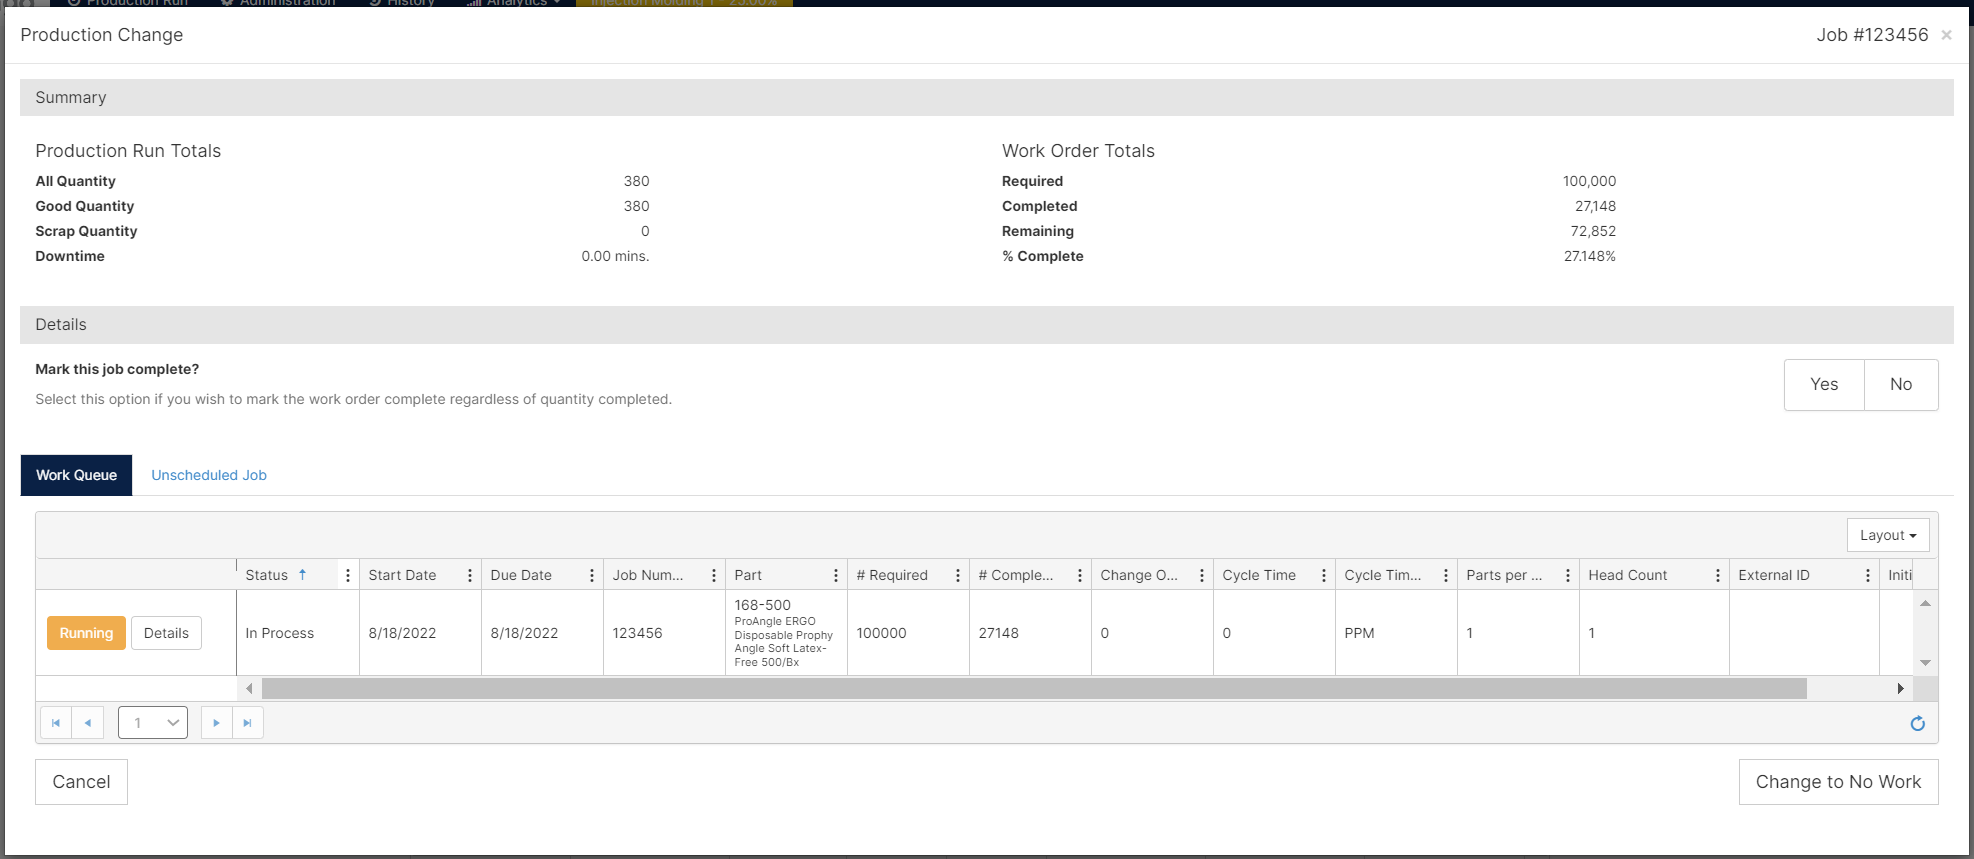
The administrator can turn on this functionality from the Company Administration screen (Administration -> Company). On the settings tab turn on Allow Manual Change Over, and ask the users to log out and back in. Users will now see a Change Over Button on the Report Production screen.
Start/Stop Production
When the operator first visits this screen, the production record has been created but production has not started. The operator must click the  button to start recording information. Once this has been done, the button will change to
  .
.
Clock In/Out
The button allows an operator to clock in or out of the production run. Click the  button, and the next popup will show on your screen.

Note: Remember to set an EmployeeID for each operator that will be clocking in/out.
More information about Clock In/Out can be found here
Details
Clicking the  button allows an operator or supervisor to enter comments about this shift or production record. It is a good place to record general information about what happened during the shift.
A supervisor or operator can also enter the head count. Headcount can be a decimal number so if 4 employees work the entire shift, but 1 employee only works half of the shift you can enter 4.5 for the headcount.
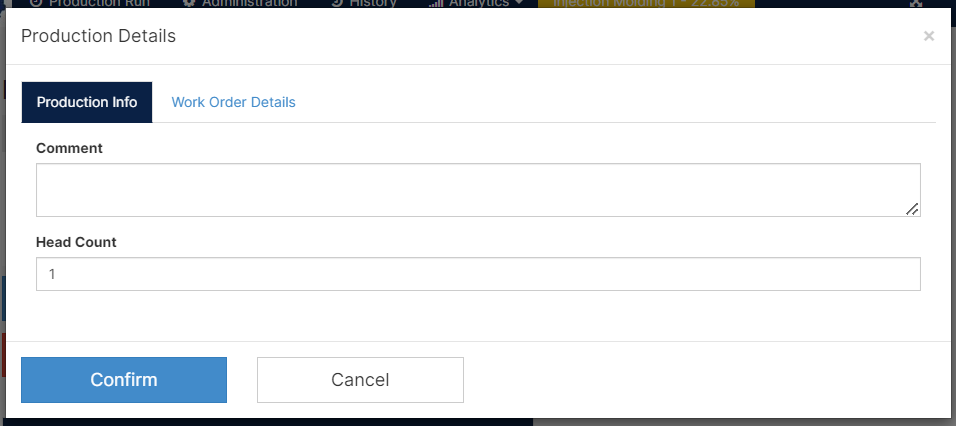
The user is also prompted to enter the head count when they stop the shift. To make sure head counts are entered on every shift setup Alerts to notify a supervisor if the headcount is 0 when the shift stops.
A user can edit the headcount after the shift is over by opening the production record from the  tab and clicking on the Details button.
Reporting Quantities
Report
The operator can type a number and click Quantity. The event is recorded at the bottom of the screen in the events list.

If your factory produces in decimal quantities, please contact Mingo Support.
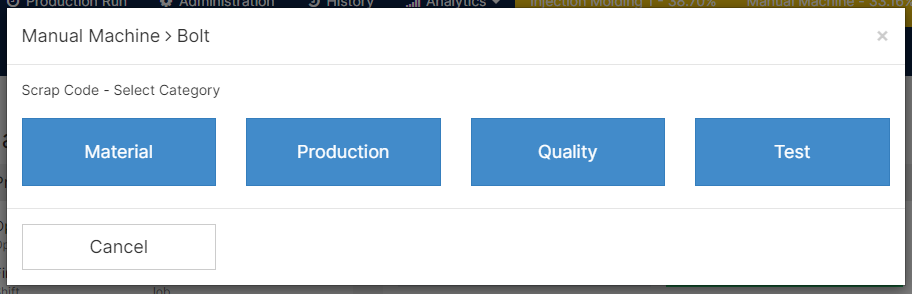
Report Scrap
To report, click on the  button. Enter the quantities for each applicable scrap type and click confirm. This screen is meant for bulk entry of scrap each column is a scrap category.
  You can also use the Scrap Wizard to report scrap. If you do not have it on, you can turn it on in Company Settings
Co-Parts
Parts can be set up to run together as Co-Parts. Production is reported from the same screen when Co-Parts are used but you must select which part you are reporting on. In the screenshot below the part highlighted in green is the one you are reporting on. To change parts, click the other part number and then you can report production.
Shift Totals
On top of the section, you will find any downtime counter. If the counter is red, then the downtime is unplanned. Any schedule or planned downtime, the counter will turn blue.  This section will contain information pertaining solely to the cell/machine as a whole. You will see the total amount of downtime in minutes, the total quantity of parts, status time ahead, Availability, Performance, and Quality linked to the shift you are currently working on.
To learn more about the statistics calculated by default in Mingo, check out OEE Explained.
Current Job/ Production Run
The section covers how much is left on the work order if it is a scheduled work order.

The parts behind, quality, estimated time to complete, and actual cycle time (parts/min) of the current work order will be visible in an unscheduled and scheduled work order.

By selecting the help prompt next to the Current Job/Production Run title, you can view an explanation of all of the calculations used to arrive at the displayed values.
Logs
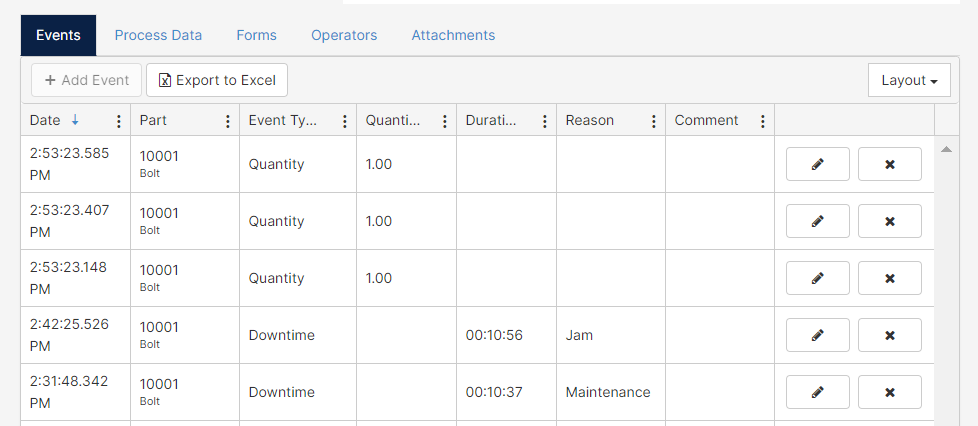
Events
This section keeps a record of every event that has occurred during this production run. This table can be exported to excel, or you can use sort, filter, or add a column to work with the data in your browser.
Users who have manage-events rights can edit events directly from the report production screen. If the user does not have manage-events rights the Edit and Delete buttons will be disabled.
Process Data
After entering any Process Data, you will find the history of the events in this tab.
Forms
You will find the forms linked to the production run in this tab. You are also able to edit them if you have the right permission. 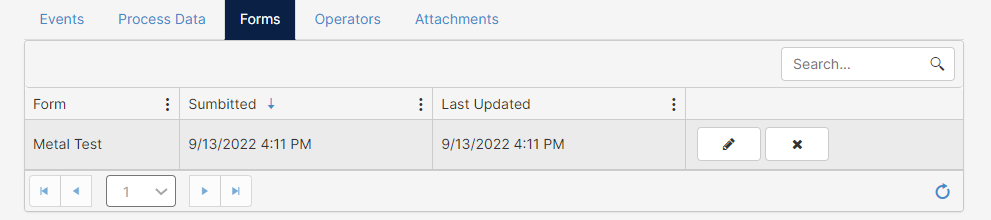
Operators
If your operators are clocking in and out of the production run, you will see the events on this tab.
Attachments
Any additional documentation you would need to attach to the production run, like instructions or specifications, will be available to the operator on this tab.